ASP NET Core
- Released June 2016
- Build on .Net core
- Cross Platform
- Not tied to .Net framework
- Unification of MVC and Web API
- Dependency Injection is core feature (no third party)
- Modular HTTP Request pipeline
- Based on NuGet � everything is package
- Cloud ready
- IIS or self-host
- Open Source
Problems with ASP NET MVC
- Dependency on IIS (System.Web)
- Dependency on .NET Framework
- Not created with cloud in mind
- Web evolves faster than .NET
Evolution of ASP.NET
- 1996 ASP
- 2002 ASP.NET Webforms
- 2008 ASP.NET MVC
- 2016 ASP.NET Core
Setting up Solution
File -> New Project -> Web -> ASP .NET Core
Project File Structure
All source code is in src folder
- There are project folders under here
- Under project there is a wwwroot folder, that contains all the static web files (html, js css, etc)
- C# or Razor files are not in the wwwroot folder
- Project.json is now the project definition file
- The whole solution has a global.json file, which is used by VS
- Note that the initial project template doesn�t even include MVC. That is a package that needs to be installed
Adding NuGet Packages for Razore, StaticFiles and MVC from AspNetCore, as declared in project.json

There is also a Program.cs file, which is the application�s entry point. Generally this file will not need to be modified.

The Startup.cs file is the configuration for the application. This class is instantiated during application startup.

MVC is added during the ConfigureServices (MVC is brought in as a service). The middleware layer is added through the IApplicationBuilder. These include things like exception handler and routing.

Creating an Overview Page
Dependency Injection Container
The dependency injection is part of ASP.NET core. Implementations of interfaces are added to the DI container called AddTransient in the Startup.cs class. This is a service:

Other services that are available are:
- AddTransient
- AddSingleton � one instance for all app
- AddScoped � one instance for each HTTP request
Implement the controller to create controllers. It is defined similar to the MVC framework (since that is what it is using).

There are two types of views
- Strongly Typed
- Regular
Note that MVC framework still uses naming convention to put Views inside the view folder and under the controller�s name. This can be overridden but generally we should use the default convention structure.
Since using MVC framework (package), the Razor function is included. Use razor syntax in the views. Example of the strongly typed view using the Pie model.
Though this example takes the IEnumerable<Pie>, this should actually be packaged into a viewmodel and pass that viewmodel instead.
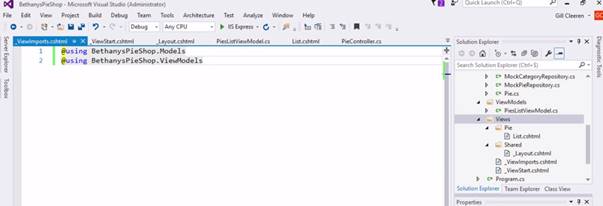
_Layout.cshtml, _ViewStart.cshtml
The common layout page to be used by all views. Contains placeholders for where views are to be inserted.
To use this layout, it needs to be referenced in each of the views. Or, we can use a _ViewStart.cshtml which will get included into every view automatically. To use the naming convention, these files should go under the Views\Shared folder. The _ViewStart and _ViewImport is added to the top Views directory (create it using the VS new view start file).
Other than NuGet, we can also use Bower to install packages like Bootstrap. Visual Studio supports this out of the box. Just add new file � Bower json file. Then configure the bower file. VS will then automatically go out and get the packages that are written in the bower file.
Note that styles and other static files should go into the wwwroot folder.

Adding Data with EF Core
Entity Framework = ORM Object Relational Mapper
Supports code first and database first only.
When doing Code First Migrations, models in code are created as tables in the data. Classes = Tables, in general.
Entity Framework 7 = Entity Framework Core
- EF 7
- Cross platform
- Open source
- Sql server and other non-relational db support
- Code First approach only (as of 2017.01)
- Added using package
Database context = bridge between code and EF Core, manages the runtime data persistence from application to the database. It also does all the actions to and from the database. The context class should derive from DbContext

Connection String = database information and how to connect to it. This is kept in the appsettings.json, there is no web.config anymore. This file is added by going File � New File � ASP NET Configuration File This file lives on the root of the application.
Configuring the Application in the Startup class. This is where the IConfigurationRoot property is set and loading of the appsettings into it.


The repository is what works with the DbContext:

Database Initialization and Migrations
Initializer checks if database definitions already exist, if not, creates it. Also, if models change, the updates are done on the database through database migrations. EF Core creates a C# class that has SQL statements to make the migrations. Also, the initial creation of a database is through a migration. These are done through the Package Manager Console.
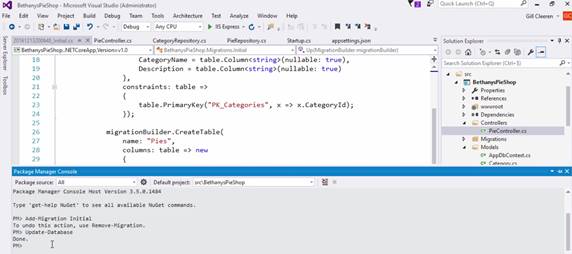
Package Manger Console
>> Add-Migration initial
This makes Core create a C# file XXXX_initial.cs. The SQL has not yet run yet. To do this, run the following command:
>> Update-Database
DbInitializer class
Create a new class in the models folder for DbInitializer. This has the seed definition for the database migration. It has the seed method that takes an IApplicationBuilder, similar to that in the Startup.cs class:

Designing More Pages
Small view that can be reused in multiple views. Partial views are injected using HTML helper, the Html.Partial. Best practice is to put partial views inside the Shared folder under the Views folder.
@Html.Partial(�NameOfPartialView�, modelToBePassedIn)
Note that HTML helpers are being phased out. It is to be replaced with Tag Helpers.
Need to add ASPNET Core session package:

Then create the ShoppingCart service inside the Startup.cs file. Note this is added as AddScoped so that it exists during the request, but its scoped per each user. This way each user gets their own ShoppingCart session. Also add the service for AddSignleton for the HTTP Context.

The session needs to be configured in the Configure method. Note it is done through the IApplicationbuilder�s UseSession method.

The following is the ShoppingCart model, which has methods for interacting with the shopping cart.

Similar to a partial view, to be used for only partial content. It is a C# class with only data it needs. It can have logic and parameters. It also follows the same separation of concern pattern, but it is always tied to it�s parent view. It is like a controller class in that it cannot be abstract and must return the viewcomponent view using view models.
Options to create a view component:
- Derive from base ViewComponent class
- [ViewComponent]
- Class that ends with ViewComponent
A view component is injected into the view by using the razor syntax and await keyword, the following code:
@await Component.InvokeAsync(�)
Note that in this example below, it is loading two different partial views

Note that in the ViewComponent it is called through the �Invoke()� method, which is implemented below. Also note that the shoppingCart object is injected via DI, as defined in the Startup.cs
file as done above.

The view is located in the Views\Shared\Components\ShoppingCartSummary

To invoke
the viewcomonent, done by �@await Component.InvokeAsync(�)�

Tag helpers enable server-side C# code to be used in the HTML elements using Razor. It is much like HTML helpers, but alleviates the confusion that HTML helpers often brings as it doesn�t always describe what it is doing. Example, @Html.Actionlink(�)
Tag helpers are clearer to what is being displayed and can be extended to create own custom tag helpers. Tag helpers are just classes that extend the TagHelper class.
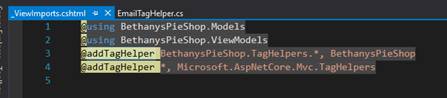
Tag helpers must be registered before they can be used. This is done in the view, or best practice is to put it in the view import file. Below is an example of a custom tag helper used to provide email links. This is the tag helper class.

In the _ViewImports.cshtml file imports the custom tag helper as well as the default one in mvc package
Once imported, the tag helper can be called from the view

Adding Navigation
ASP.NET Webforms use to be file base navigation (going to that specific file). In MVC, the routing was done through the controllers (going to an Action method). This required a routing engine. ASP.NET Core uses this same engine.
HTML Helpers like the Html.ActionLink is not really used, since we�re moving towards Tag Helpers. The new tag helpers look like <a asp-controller=� asp-action=�> This new format makes the appearance look more like HTML.
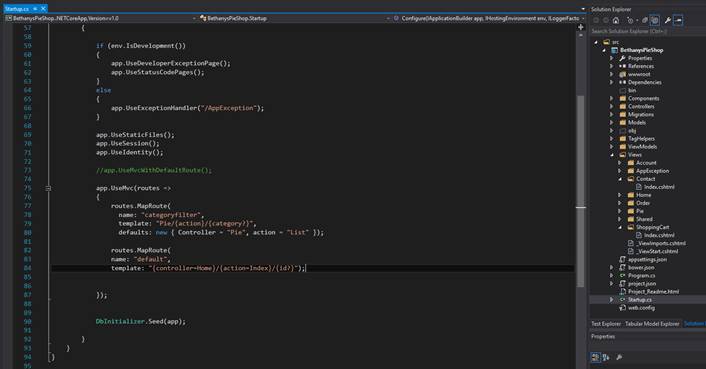
The routes are defined in the Startup.cs file. This looks like:
And here is the new tag helper. Note that the passed in parameter must match in name. This follows original MVC convention with routing.


And here is example of using the tag helpers in a loop:

Note that the controller�s action parameters are passed in with names.
Use tag helpers in the forms as well. The following are some built in tag helpers
- Form tag helper
- Input tag helper
- Label tag helper
- Textarea tag helper
- Select tag helper
- Validation tag helpers
<label asp-for=�ModelProperty�></label>

<label for=�ModelProperty� class=�cssClass�>value</label>

<form asp-action=��� asp-antiforgery-token=�true� �>

Note how the <form asp-action �> has the <input asp-for=��> tags beneath it.
Form validation can be done through model binding. It uses the old MVC check � ModelState.IsValid. This checks the attributes defined in the model class. This is part of ASPNET Core MVC. We can use constraints, regex, patterns, required and other custom attributes on the models.


Adding Client-side Functionality
We can use client-side libraries for client-side functions. These packages can be downloaded using Bower. This needs to be defined in the bower.json file.

References to JS libraries need to be added in the _layout.cshtml file.
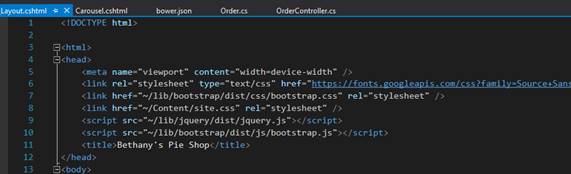
Note that in the _Layout.cshthml file we can include @RenderSection(�scripts�, required: false) to import the scripts through MVC�s @section scripts. Which looks like:
There is no difference between MVC and API controllers. ASPNET Core has made these the same. In an API though, we should have different Routes, for example to use the ../api/ route extension is part of the ASPNET naming convention. Also, in API controllers we should have attribtues defining which HTTP method that action accepts, example = [HttpGet].

Adding Security Using ASP.NET Identity
ASPNET Core Identity is a membership system that manages users authentication
- Authentication
- Authorization
- Uses old .NET Membership
- Supports External Providers
- Supports SQL Membership (again old .NET Membership)
In the projects.json file, must include the Microsoft.AspNetCore.Identity.EntityFrameworkCore
To use Identity and store in our database, should include the IdentityDbContext in the AppDbContext. This is a separate context than the already existing context for working with application data.

Also, in the Confugration file must include the AddIdentity to the services.


In the example below you will see we are tracking the following two instances to handle user accounts and user login:
- UserManger<IdentityUser>
- SignInManger<IdentityUser>

Deploying the Site to Azure
Can configure ASPNet core applications to run on Azure. We have credits as part of our MSDN subscription.
Handling Environments
ASPNET Core applications can work with multiple environements
- Development environment
- Staging
- Production
This can be defined in the Properties of Project. Environment variables for ASPNET_ENVIRONMENT which sets the environment it is currently deploying to. That property is stored in the launchSettings.json file.

The environment can be accessed through IHostingEnvironment
- EnvironmentName
- IsDevelopment()
- IsStaging()
- IsProduction()
We can see this in the Startup.cs file. In the example below we are creating an ExceptionController.

Deployment Options
We can deploy to
- Azure
- IIS
- Docker
- Linux